Back in the (Dragoon) Saddle!
After a hiatus of some eight months – the Duke is back!
His Grace has asked me to pass on his apologises for his enforced absence while he has been “distracted by sensitive affairs of State” (usually his code for keeping a low profile due to tax reasons). For my own part, too much of the last twelve months or so have been blighted by the slings and arrows of ‘real life’ and by the end of last year my miniatures painting had ground to a complete halt. I have barely picked up a brush since then, but in recent times a degree of normality has returned (including new employment) and I have started to paint again. So it’s time to re-boot the Blog.
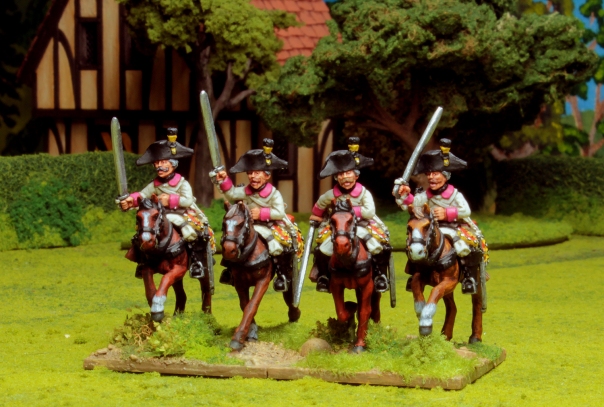
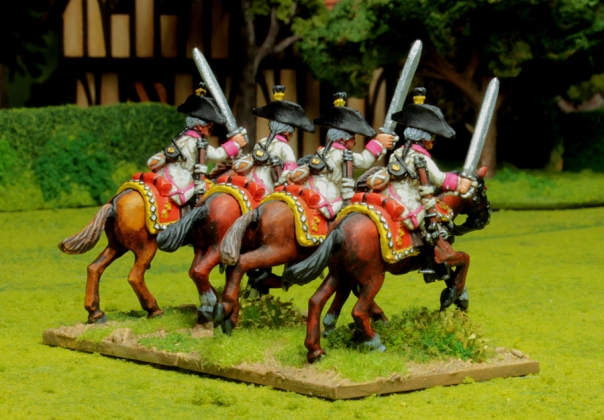
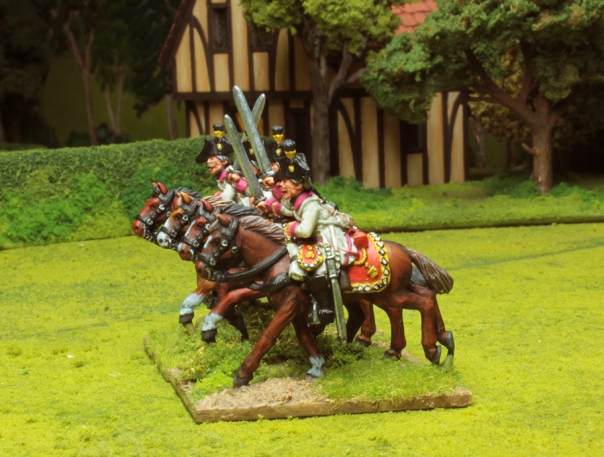
I’m breaking myself back in gradually (and you – gentle reader!) with a few small steps. Here is the first of them – a test run on four of Eureka Miniatures’ Austrian Dragoons for the Wars of the French Revolution, in advance of what will eventually be a larger unit of perhaps 12 or 16 figures.
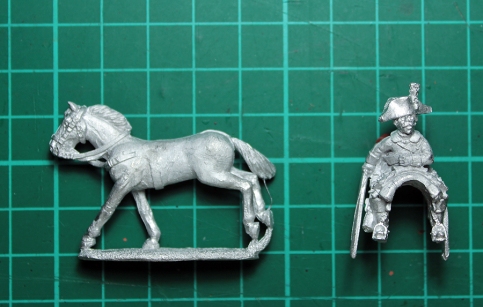
It has been a long time since I last painted any 28mm cavalry figures and I had forgotten how fiddly they can be. Each figure comprises two separate pieces: horse and rider – with the saddle and most of the horse furniture incorporated into the rider half of the miniature. The techniques employed to paint the rider (my usual approach of white undercoat and acrylic paint) and the horse flesh (an oil paint ‘wash and wipe’ method) are very different and the latter is rather messy, which encourages painting the two halves of the figure separately before gluing everything together near the end.
The dilemma here is that while the horse can be simply attached by its base to a temporary handle for ease of painting, the rider (with no standing base of its own) is difficult to attach to anything. Holding the figure in your fingers while attempting to paint can make life difficult. Some figure painters use narrow, domed topped pegs as painting handles that are custom made to be temporarily glued snugly into the u-shaped ‘tunnel’ under the rider’s saddle cloth, but I have yet to develop a system I’m comfortable with.
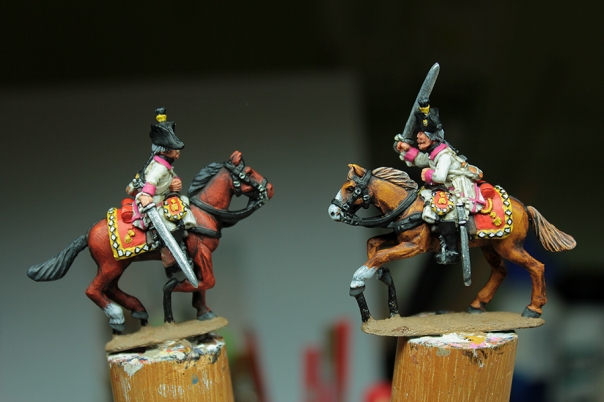
Well, for now, I just decided to plunge in and get on with it! The horses were mounted on my usual painting pegs – no problems there (and more on the horse painting technique a little later), but for the riders I resolved to paint just the lower half of the figure and their horse furniture (saddle cloth etc) while carefully grasping the casting by the head. The intention was then to attach the half painted rider to the (by then) completed horse and then paint the rest of him (head, shoulders etc) in situ on his mount. For the most part this worked out OK, aside from some major issues with finger cramp! My principal concern was how much finger grease I was getting on to the top half of the rider figures while I was clutching them in my hot, sweaty paws. Acrylic paint does not like grease of any kind, and I don’t like wearing plastic/rubber gloves. So once I had the half painted riders mounted on their finished horses I took some time to carefully clean up the parts of the figure I’d been holding using a cotton bud dipped in isopropyl alcohol before undercoating with my usual thinned white enamel paint. Incidentally, the thinned enamel undercoat can spray around a bit if you are too enthusiastic with the brush, so I cut out some little newspaper ‘aprons’ to wrap-around and cover the painted horse and the rider’s lower extremities to shield them from any accidental splashes.
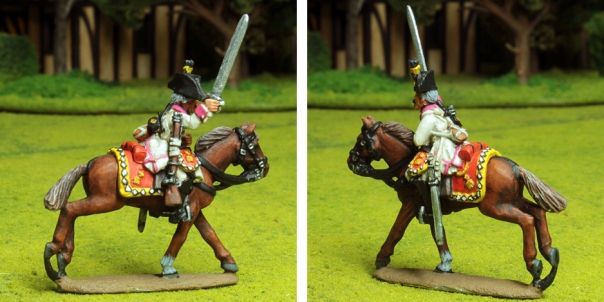
But enough of the tiresome logistics! What am I painting here? These are Austrian Dragoons roughly for the period 1792 – 1799, but principally they are meant to represent the 37th Cavalry Regiment, Coburg Dragoons, at the Battle of Neerwinden in 1793. Anyone who has ever dipped into the subject of Austrian cavalry during the Revolutionary and early Napoleonic Wars will know it is a near impenetrable mire of revised organisations, shifting regimental identities and changing uniform details – worthy of a entire Blog post in its own right to try and make sense of it all. For example, those readers more familiar with the sequential regimental numbering system of the later periods should note that prior to 1798 the Austrian army numbered its regiments without recourse to the type of cavalry regiment. Hence the army’s six Dragoon regiments in 1793 were not numbered 1 to 6 (as they were later), but 3, 9, 26, 37, 38 and 39! The 37th Cavalry Regiment would briefly become the 6th Light Dragoon Regiment in 1798, and then the 6th Dragoon Regiment in 1801. Other units had even more chequered progressions: the 9th Cavalry Regiment (Dragoons) was renumbered the 15th Light Dragoons in 1798 before changing to the 5th Dragoons in 1801. Confused? We are just scratching the surface here folks! It is sometimes easier to keep track of regiments by the names of their Inhaber (colonel-proprietor) and in the case of the 37th (6th) they remain the Coburg Dragoons throughout the period, but other regimental names switched with a change of Inhaber to add to the confusion.
It is also hard to be absolutely certain about the uniform facing colours. Depending on the source consulted the 37th Cavalry Regiment, Coburg Dragoons wore white uniforms with “Pompadour”, or perhaps “Ponceau” (sometimes called “Poppy Red”) coloured facings. The interpretation of these colours is problematic, but I have gone with Pompadour and based the shade on the research of Dave Hollins, Michael MacGillivray, and Terry Webb. Iannick Martin’s website “Clash of Empires” hosts Terry Webb’s and Dave Hollins’ interpretation of the colours here http://www.clashofempires.ca/austrianfacingcolors.htm (with useful Vallejo Paint match suggestions) and Michael MacGillivray’s interpretation of the various Austrian shades of red (again in conjunction with Dave Hollins) can be seen here at http://deepfriedhappymice.com/html/ref_sy_aus_colors_red.html. Pompadour appears to have been a distinctly magenta shade of red and I have painted accordingly. The rest of the uniform colours and equipment appearance are well established.
A few words on painting horses… As mentioned early I employ the enamel/oil paint based wash-and-wipe method I mentioned earlier. This popular horse painting technique is well known to many figure painters and has a long and noble tradition championed by current painting superstars like Kevin Dallimore and has origins stretching back to the late-great Peter Gilder and other godfathers of early 1970’s wargaming. In essence it involves first undercoating the horse in a selection of strong pigmented matt enamel paint colours (reds, browns and yellows to achieve most horse colours), and once this is thoroughly dry, the whole horse is then ‘stained’ with a generous coat of slightly thinned artist’s oil paint – Burnt Umber is a common choice. Then comes the clever bit. While the oil paint is still wet you take a soft rag and gently wipe off the oil paint from the horse’s extremities – leaving the oil paint where you want shade, such as lower legs and around the larger muscles. There is something about this method that nicely recreates the subtle changes of shade and sheen you see on real horse flesh. The key to it is selecting the right enamel undercoat base colours that show through the oil paint: these need to be strong – bright even – as the oil stain darkens and mutes everything down so much. Over the years of reading various magazine and internet articles on the technique it is interesting how various painters have independently gravitated towards much the same base colours. Humbrol “Red Brown” enamel (number 100) is a reoccurring choice for chestnut browns for example. A dark blue can work well for black horses (an old Peter Gilder recommendation I think). I could go into a lot more detail here, but I will save myself a lot of typing by simply recommending http://themetalmountain.blogspot.com.au/2012/05/painting-horses.html – with some good pictures – on the excellent Metal Mountain Blog by “olddorg”. I think his horses look great!
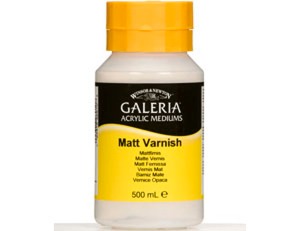
As an aside, this is the first time I have used Windsor & Newton “Galeria” Matt Varnish (as recommended by various painters around the internet, such as Barry Hilton) for finishing and protecting the figures – and I’m pleased with the results. Varnishing figures and the choice of varnish is a subject frequently debated adinfinitum across the miniatures forums and Blogs, to the point that it has become something of an in-joke. I have no wish to add to the great volumes written on the subject here, apart from to say that I have been pursuing an acrylic varnish solution in an attempt to avoid the dangers of age induced ‘yellowing’ that can affect traditional oil based / enamel varnishes (I have some old figures afflicted with this condition). The downside is that acrylic varnishes seldom dry absolutely matt. Well, I can report that Windsor & Newton “Galeria” Matt Varnish (not to be confused with their other acrylic artist varnishes) works very well: not totally matt, but not far off it. The key seems to be to use thin coats, don’t over-work it with the brush, and really let it dry (like a day or two) – it gets more matt as it hardens. Anyway, I intend to persevere with it.
And not forgetting the “Poor, Bloody Infantry”…
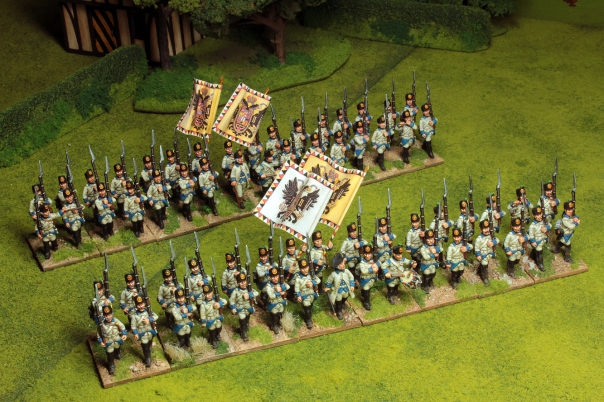
The Duke’s Austrian infantry regiment (1792-1798) will be very familiar to some readers as they have featured in a couple of Eureka Miniatures adverts in the distant past and I have hawked pictures of the first battalion around a few of the miniatures forums over the last couple of years. So a bit ‘old hat’, but they have not had an official introduction on World Crisis in Miniature and this is the first time I have photographed both battalions together – primarily because I only finally got around to finishing the basing on the second battalion a couple of months ago. (It must be 18 months at least since I painted the figures!)
Still not quite finished yet though, as they need someone to command them. The Duke likes his regiments to be led by mounted officers on separate bases, so I will be adding something suitable in the near future. I have decided I like the look of 32 figure battalions (arranged in two ranks) for 28mm figures. Some wargamers play with quite small infantry units (perhaps as little as 12 figures) which I sometimes find a bit visually unsatisfying, while other table top generals are well heeled enough – and have the space – to command much larger battalions of 48 or even 60 figures. I am blessed with a near-permanent gaming table set up, but at seven feet by five it is not the largest and 32 figures seems to be a good balance between the visual aesthetic I want and not having units that are so big I can only get a limited number of them on the table.
What’s next?
So hopefully that has got the Duke back into the swing of things and it will not be another eight months before World Crisis in Miniature returns. And to keep things ticking along I intend to follow this post up with a few more regular, shorter updates on a variety of things I’ll be working on in the coming weeks. The Coburg Dragoons will need expanding and more French infantry are required, but it’s also about time that I properly introduced everyone to the Duke’s other passions – namely his plastic figure based 1/72 – 1/76 (20mm) World War Two project and his 1/3000 Great War dreadnought fleets.
Salutations
DPT
Posted on July 28, 2013, in 1792-1815 (28mm), Home and tagged 28mm miniatures, miniatures painting, Wars of the French Revolution. Bookmark the permalink. 3 Comments.
Dearest Duke … if that is not being too familiar!
Lovely work on the dragoons, especially the saddle cloths.
Like you I have issues painting cavalrymen as I glue them to their horses after both parties are completely painted for much the same reasons as you.
1. I know some painters who have wire extensions of an inch or two fixed to their painting bases. The other end of the wire they insert & glue into holes drilled in the underside of the cavalryman. The cavalryman is then left in splendid isolation above the held painting base. I’m not sure that I’ve explained it well at all!
2. I usually use the simple expedient of sticking my cavalrymen onto spare horses which are then stuck to a painting base.
Welcome back to blog land. I’m looking forward to your next post.
Salute
von peter himself
Very nice painting ! The cavalry look fine . Cheers
Just re-discovered your blog. Lovely stuff mate, very skillfull painting of fine figures.
Dave.
http://thenorthumbrianwargamer.blogspot.co.uk/search/label/28mm%20French%20Revolutionary